Mining Scala (XLA) using SRBMiner - A tutorial for beginners
SRBMiner has got a good reputation of mining Scala (XLA) since it can boost the hashrate a bit further compared to other mining softwares.
The developer fee for mining Scala (XLA), panthera algorithm, is 0.85% using SRBMiner.
Part 1 - Downloading and extracting SRBMiner
Download SRBMiner-Multi on GitHub, current realease for Windows is SRBMiner-Multi-0-7-3-win64.zip

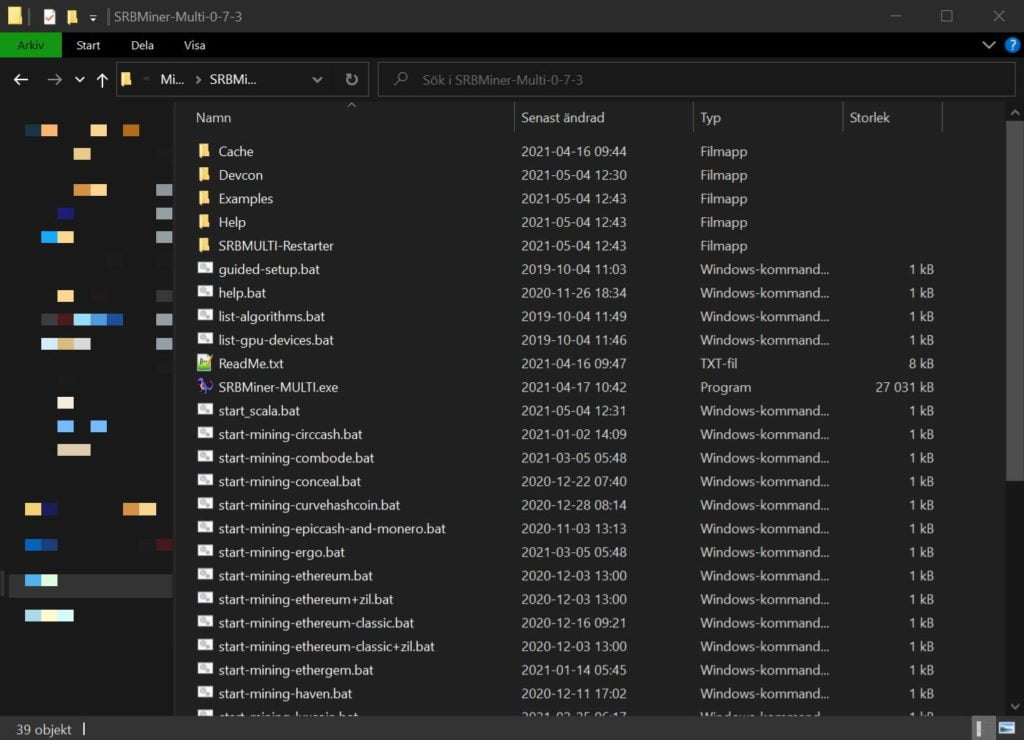
Extract the zip file to an appropriate location on your hard drive (Extraction software tip: 7-Zip). It doesn't really matter where you extract the files but for the sake of this tutorial, I'll put it in C:\Miners\SRBMiner-Multi-0-7-3

Part 2 - Create a wallet
You can skip this step if you already have a Scala (XLA) wallet.
A crypto wallet is in simple terms pretty much like a normal wallet - it holds your digital currency safe and secure wherever you want. You can even store it on a piece of paper in your own wallet, like a wallet-inception 😀
The most convenient way to create a Scala (XLA) wallet is through the GUI softwares provided by the Scala team, either the mobile version and/or the desktop version. I'll guide you through the mobile version since it's probably the easiest for beginners.
- Download and install Scala Vault
Head over to the Play Store and search for "Scala" or use the button to find and install Svala Vault:

- Create a new wallet
- Give your wallet a name and a password (optional)
- Write down your seed phrase
Do it on a piece of paper and store it in a vault or use a secure password manager. The choice is yours, just remember where you have the phrase stored. - Copy your public address (you'll need it later)
Part 3 - Configure SRBMiner
While there are a few ways to create the bat-file we need to start the miner I'll guide you through the easiest method: the guided setup.
Double click on "guided-setup.bat" and you'll be greeted with "Configuration name:", type in something that will represent the name of the scala bat file, lets go with "Scala"
Do you want to use multi algorithm mining?
In our case: n (for no)

Enter algorithm 0 name :
panthera
In the next step we'll define the pool. In my case, I'm using HeroMiners pool in Finland since that pool is closest to my location (Sweden). Choose a pool that is close to you. I'll put up a post with pools later on.
Address and port of mining pool [address:port]
stratum+ssl://fi.scala.herominers.com:10135
Wallet address
Paste your wallet address or try with mine if you're feeling generous 🙂
Svkmyq8bhfUjim5iiEHqdMABiPyv86VrAQnwpQDsTayRcH4k2q321qnBrhJFAvrBrjYEtkmBdUUwWDDwFA6p6m3u31DLzuHWd
Password
A bit confusing one might say. This is your worker name. It could be anything really but it's a way for you to know which worker is which in the pool. Name it something to identify your device, "homepc" for example.
Do you want to enable logging ?
n (We can enable it later on if we need to)

Part 4 - Lets start mining!
Now for the fun part - the actual mining!
After completing the guided setup a new bat-file was created with the name "start_Scala.bat". All you have to do is to right click on this file and choose "Run as administrator".
Doesn't work?
Try adding the path to SRBMiner-MULTI.exe within the bat-file. Right click "start_Scala.bat" and choose edit. Change "SRBMiner-MULTI.exe" to "C:\Miners\SRBMiner-Multi-0-7-3\SRBMiner-MULTI.exe". I also recommend adding a "pause" on the last line to be able to see what step failed during the process. An example:
@echo off
cd %~dp0

cls
C:\Miners\SRBMiner-Multi-0-7-3\SRBMiner-MULTI.exe --algorithm panthera --pool stratum+ssl://fi.scala.herominers.com:10135 --wallet Svkmyq8bhfUjim5iiEHqdMABiPyv86VrAQnwpQDsTayRcH4k2q321qnBrhJFAvrBrjYEtkmBdUUwWDDwFA6p6m3u31DLzuHWd --password homepc --cpu-threads 0 --disable-gpu
pause